
 Guidelines for Settings in the KnitsThatFit Sweaters & Cardigans App
If you do not have all of the features shown below, you may not have the latest app version, please head to the App Store to update your app!
The Settings Screen:
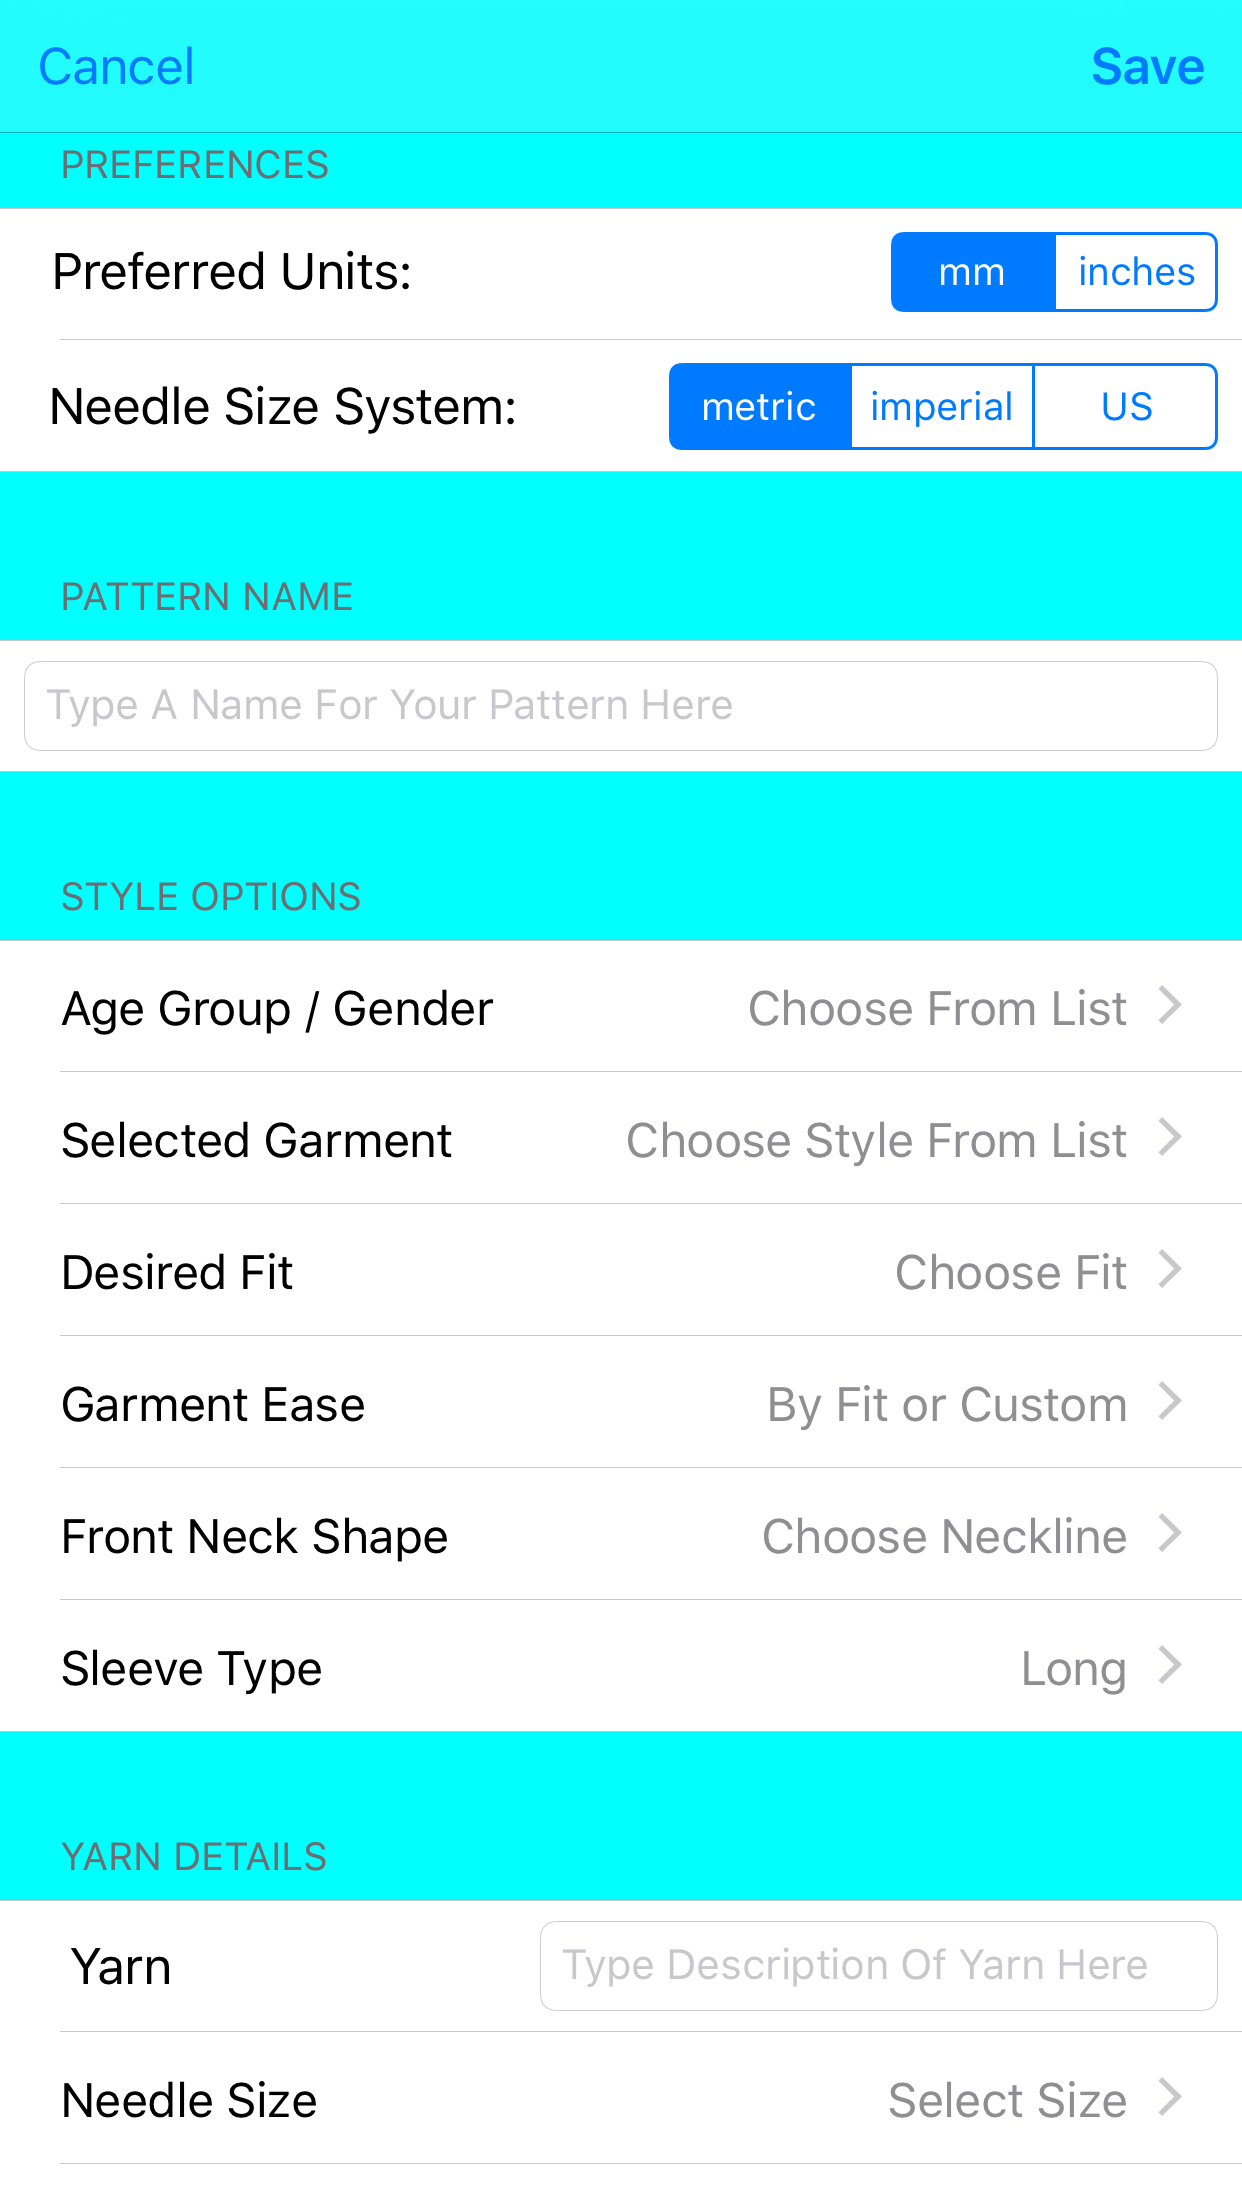
- Choose preferred units: default is mm (metric). All measurements will need to be input in cm. Note that this setting will apply to ALL of your patterns, and must be selected before any measurements are selected.
- Choose Needle size system: Default is metric. Choose the system to match the needles that you will be using. As for the preferred units, this setting will apply to all of your patterns and must be selected before choosing the needle size for your pattern, in order for the correct value to be displayed in your pattern.
- Pattern Name: Type a name for your pattern, this can be anything you like.
- Choose the Age /Gender category of the person you are knitting for – choose from Women, Men, Babies & Toddlers, Girls aged 3 – 14, or Boys aged 3 to 14.
- Selected Garment: Choose to make a Sweater or Cardigan. (Choose Cardigan if you want to make a jacket).
- Desired Fit: Choose fit for the garment shape. A default ease is set for each choice of fit, but this can be adjusted in the next step.
- Very Close Fitting: zero ease. This style has waist shaping and fitted sleeves.
- Close-fitting: 1 inch / 2.5cm ease.This style has waist shaping and fitted sleeves.
- Standard-Fitting: 2 inches / 5cm ease. This style has fitted sleeves but does not have waist shaping.
- Loose-Fitting: 4 inches / 10cm ease. This style is an easier fit, with set in sleeves and no waist shaping.
- Oversized: 6 inches / 15cm ease. This style has drop shoulder sleeve and no waist shaping.
- Garment Ease: This will show the amount of ease around the body based on the fit that you have selected. If you want, you can change this value.
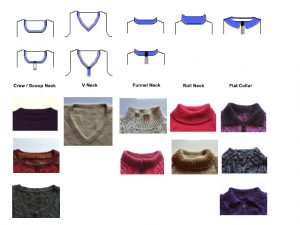
- Front Neck Shape – choose from the available options, currently – Crew / Round / Scoop Neck, V-Neck, Funnel-Neck, Roll-Neck, Flat Collar.
- Sleeve Type: the default is long sleeve, edit for three-quarter length short, cap or sleeveless.
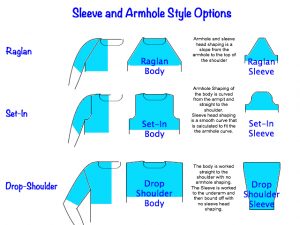
- Sleeve / Armhole Style: Choose the armhole and sleeve head style. The options are Set-in (default), Raglan or Drop-Shoulder.
- Yarn: Type a name for your yarn, this can be anything you like, to identify which yarn you created this pattern for.
- Needle size: Choose the main needle size that you will use for your chosen yarn for this pattern. The pattern will automatically specify a smaller size for rib.
- Main Stitch Pattern: choose from Stocking Stitch, Reverse Stocking Stitch, Single Rib, Double Rib, Garter Stitch, Moss Stitch (seed stitch).
- To use any other stitch pattern, choose ‘Other’. You can then use settings to adjust for pattern repeats or to centralise a pattern or panel on your work. There are many sources of stitch patterns, such as books, magazines, websites, Pinterest.
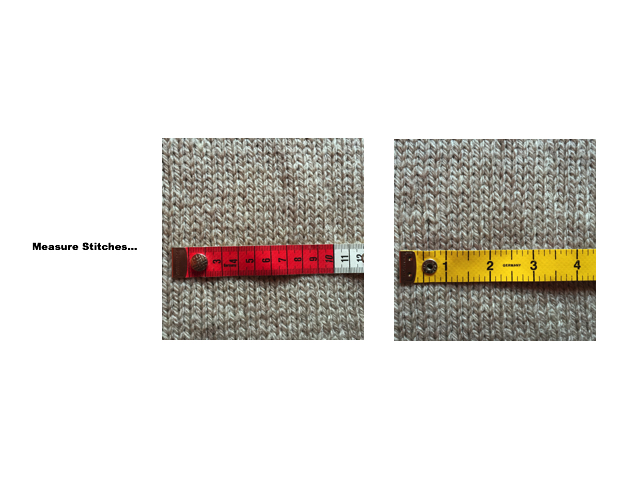
- For best results knit a tension square before you start: use the yarn and needles that you have chosen, and with stocking stitch (or your chosen stitch pattern), knit a square larger than 10cm / 4 inches in both directions, and count the number of stitches and rows to make a 10cm / 4 inch square.
- Select the stitches to make the tension square as described in 8.
- Select the rows to make a tension square as described in 8.
- Rib Stitch: Choose the rib stitch that you would like for this pattern.
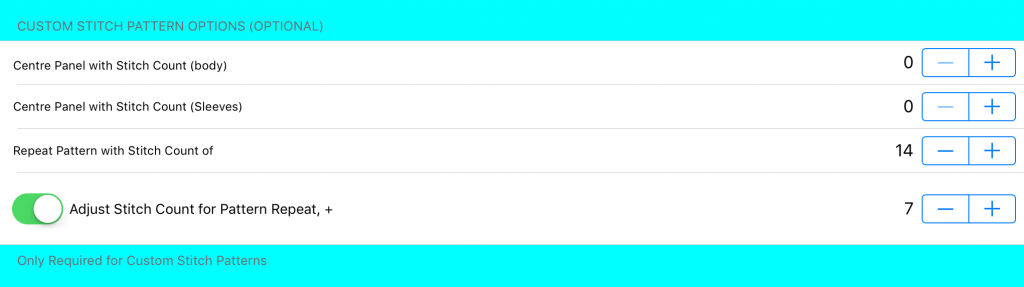
- Custom Stitch Pattern Options (optional): If you are using your own stitch pattern, you can use this section to centralise your pattern on your work, or to adjust the stitch count for a number of pattern repeats.
- If you are working a centre panel on the back or front of the body, use the Centre Panel With Stitch Count (Body) to enter the number of stitches in the panel, so that the pattern instructions will tell you how many stitches to work either side of the panel when you set it up, so that it is centralised on your work. If this value is 0, the pattern will not give instructions to centralise the panel.
- If you are working a centre panel on the sleeves, use the Centre Panel With Stitch Count (Sleeves) to enter the number of stitches in the panel, so that the pattern instructions will tell you how many stitches to work either side of the panel when you set it up, so that it is centralised on your work. If this value is 0, the pattern will not give instructions to centralise the panel.
- If your stitch pattern has a pattern repeat, set the Repeat Pattern With Stitch Count of.. to show the number of stitches in the pattern repeat. The pattern instructions will tell you how to centralise a whole number of pattern repeats on your work, OR
- Toggle the Adjust Stitch Count for Pattern Repeat button to the ON position (green), to adjust the stitch count of the body for a whole number of pattern repeats. If you need the adjustment to be for a multiple of the pattern repeats plus a part of the pattern repeat, then adjust the + number for the number of extra stitches to be added to the multiple of whole pattern repeats. e.g. you have a pattern repeat of 14 stitches, but so that the pattern looks centralised, you need to work the first 7 stitches of the pattern repeat at the end of the row; set the Repeat Pattern With Stitch Count of to 14, and then toggle the Adjust Stitch Count for Pattern Repeat button to the ON position (green), with + 7.
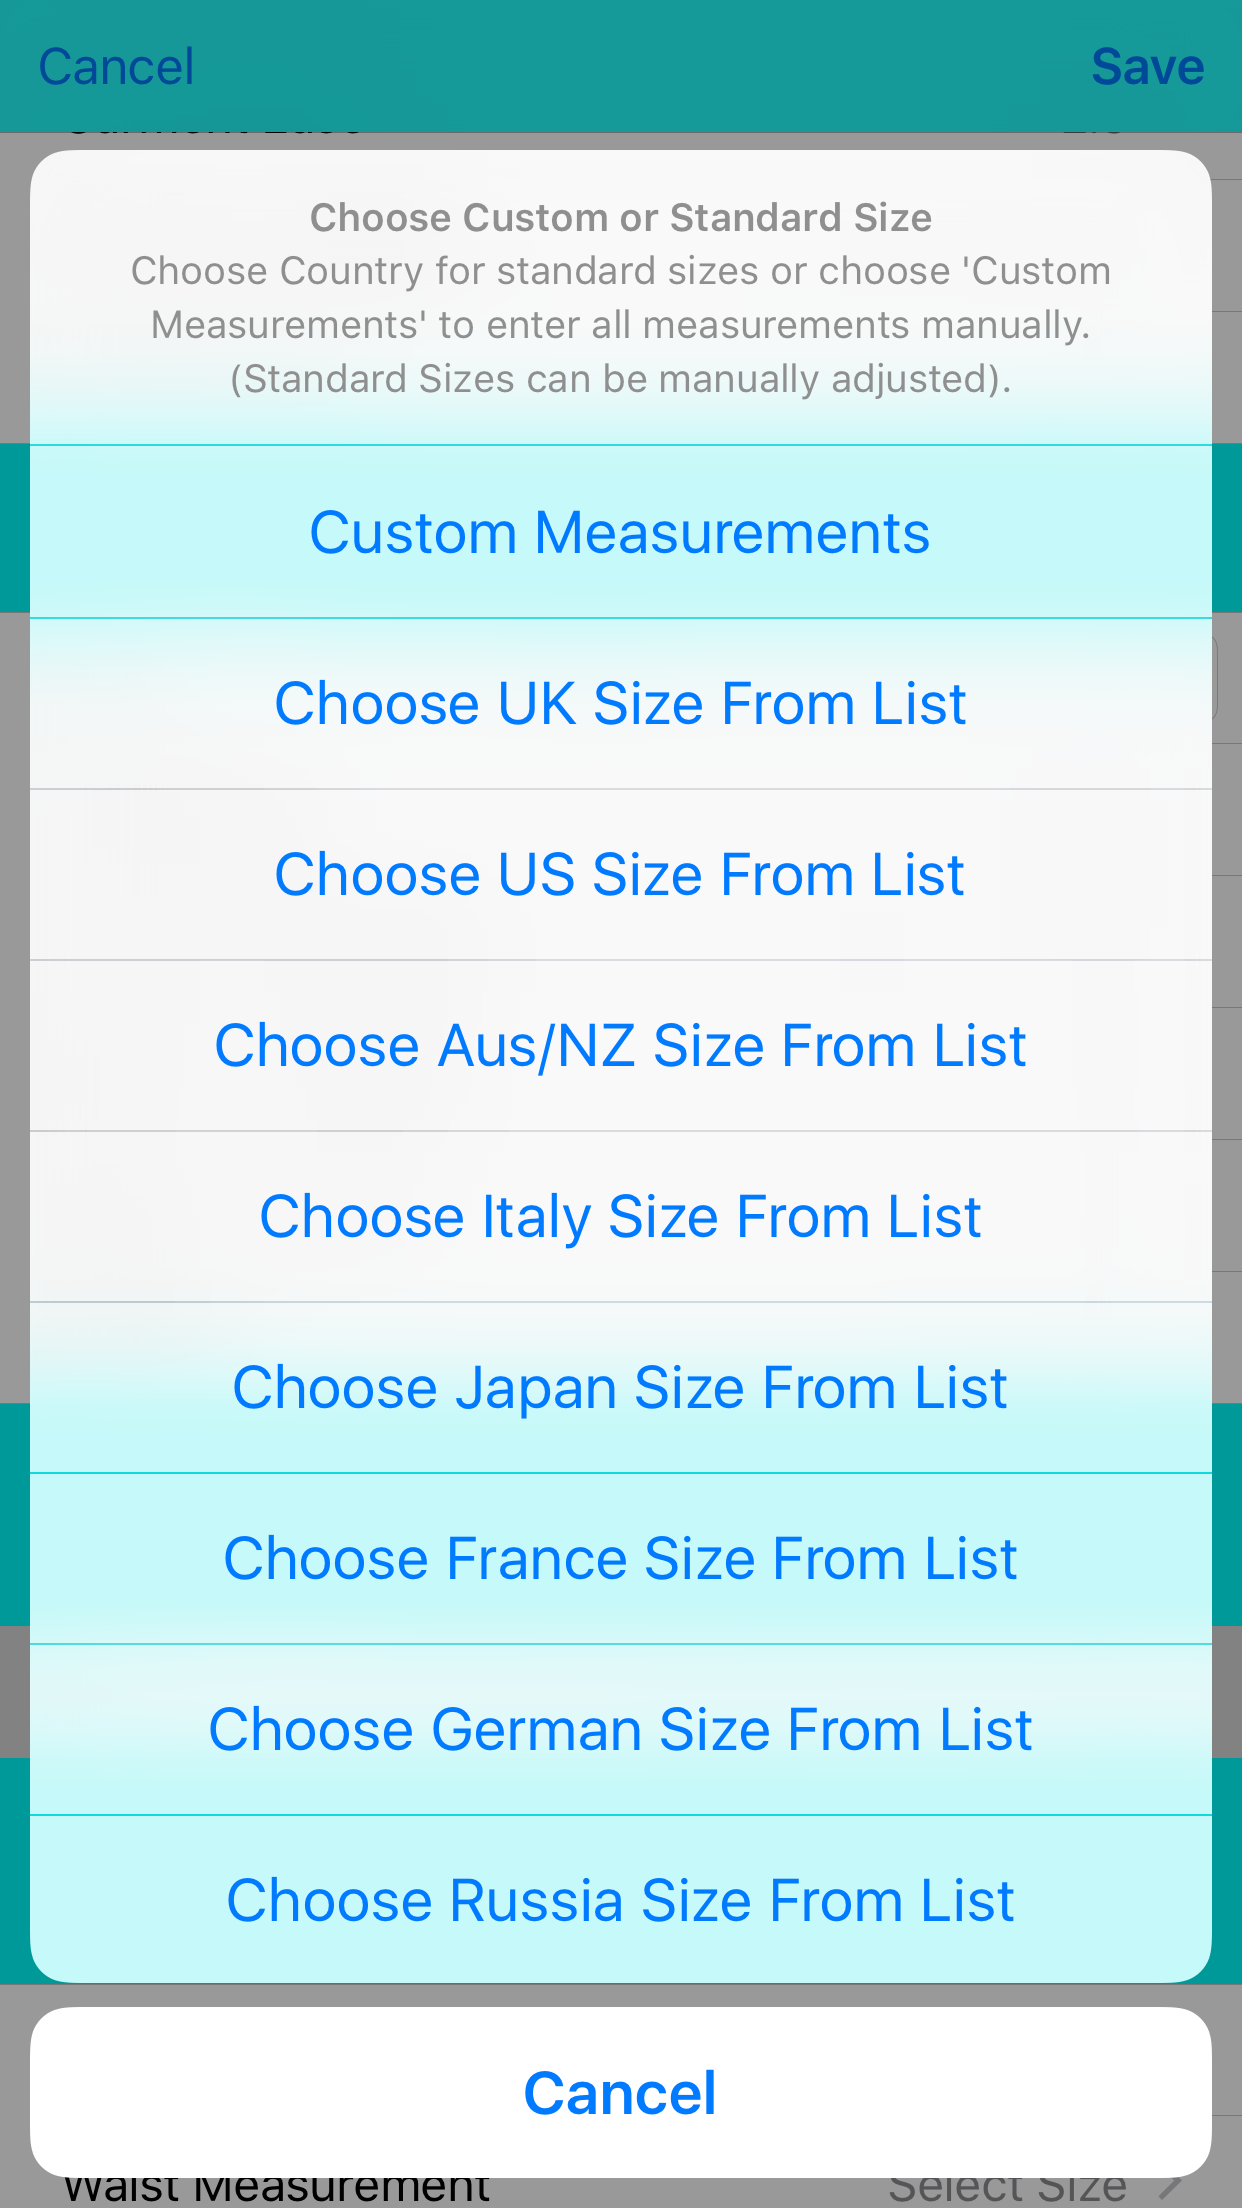
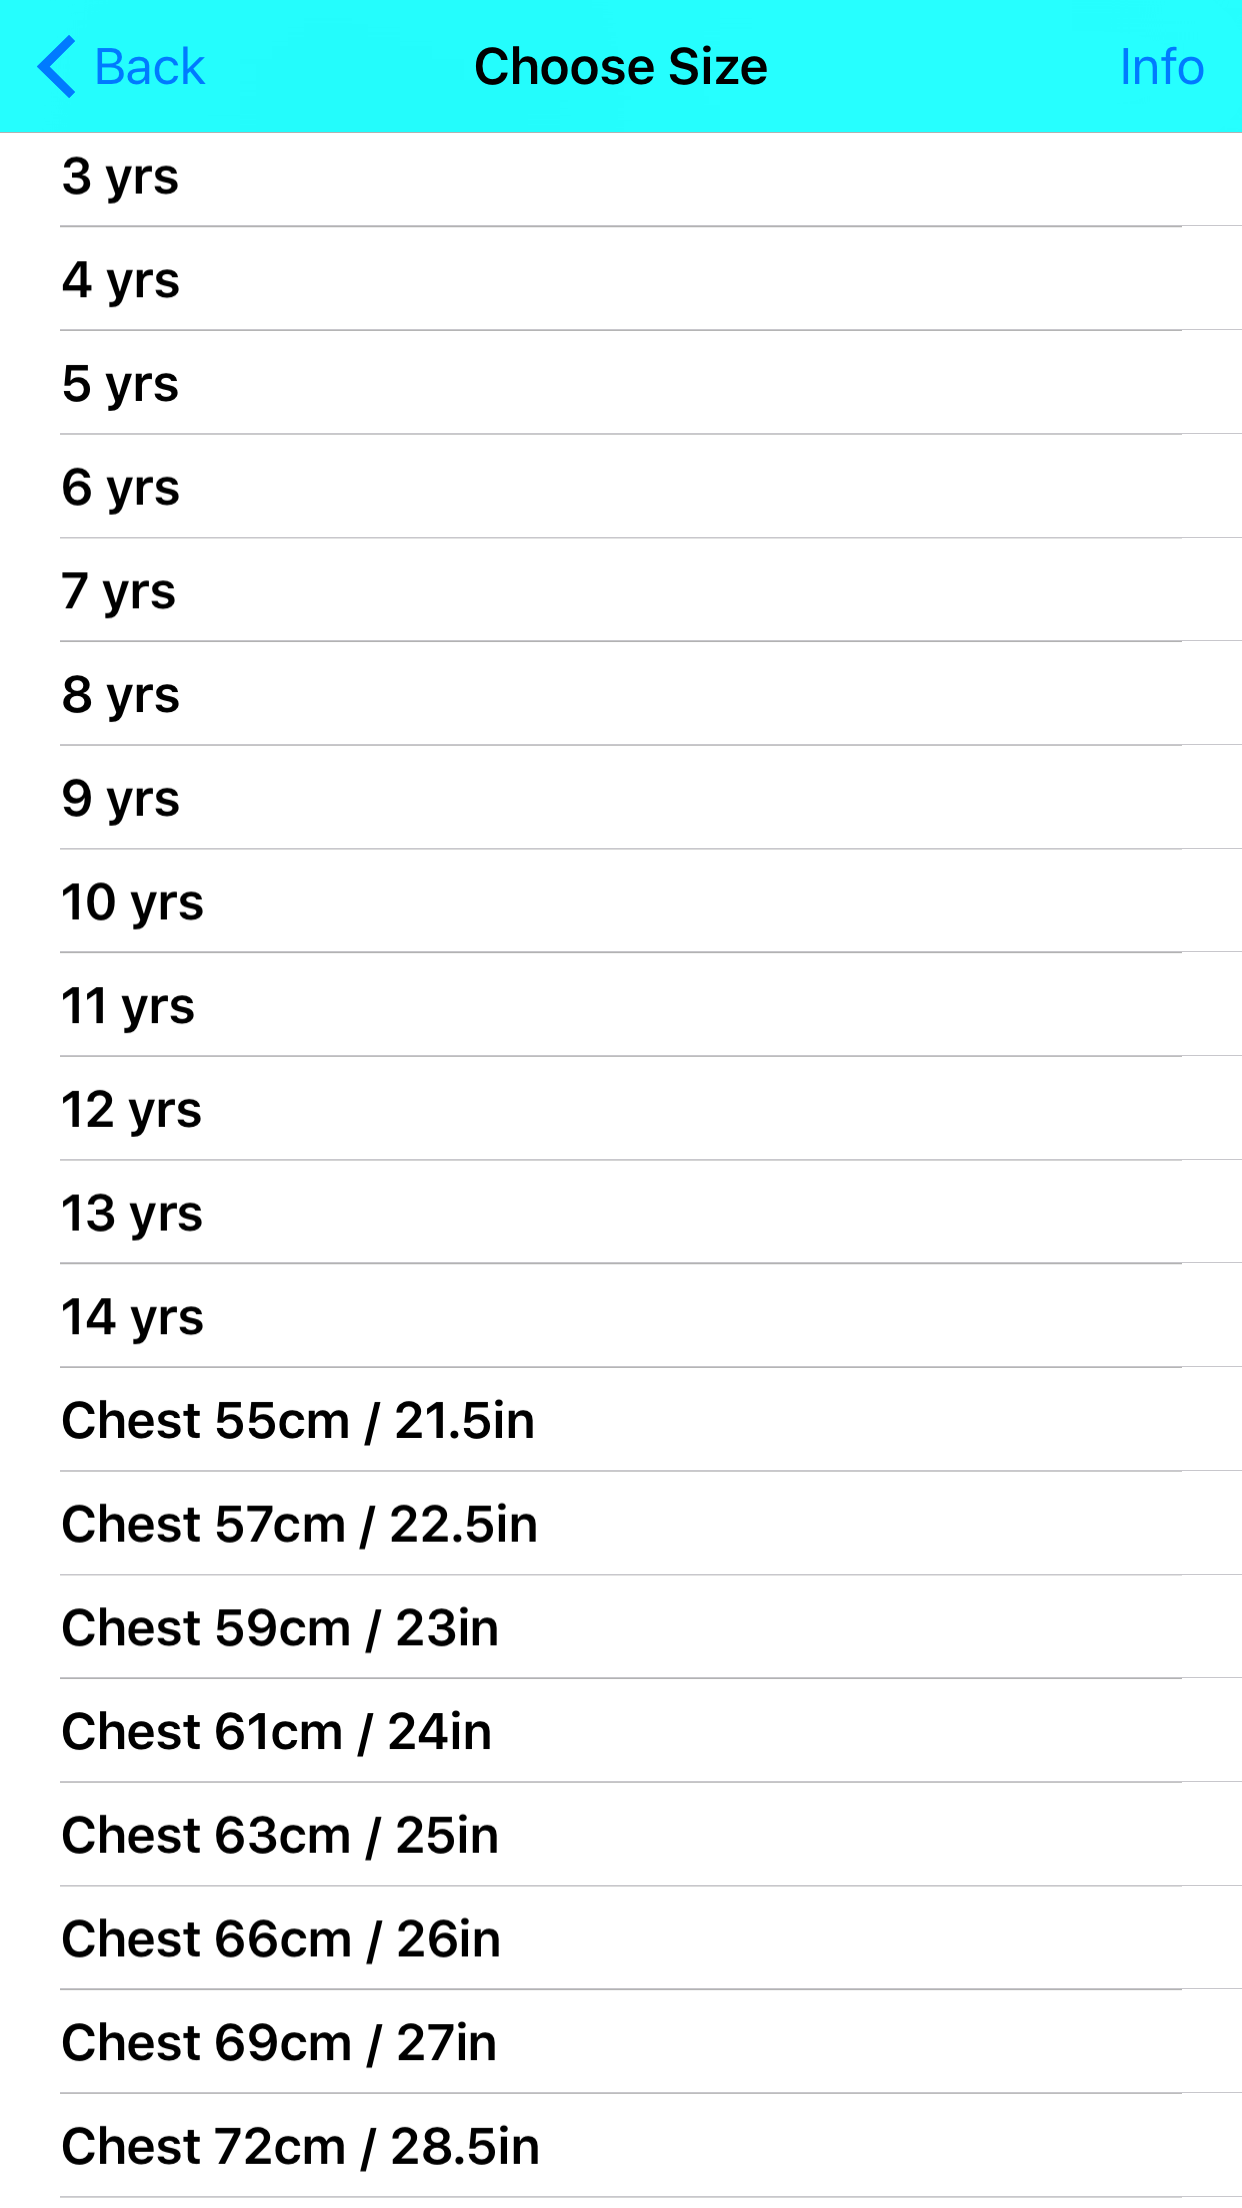
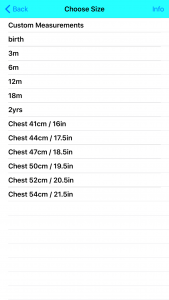
- Choose a standard size for the garment, or choose to Custom Measurements to enter all measurements individually. If choosing a standard size, choose the clothing size to give the best fit, each measurement can be adjusted.
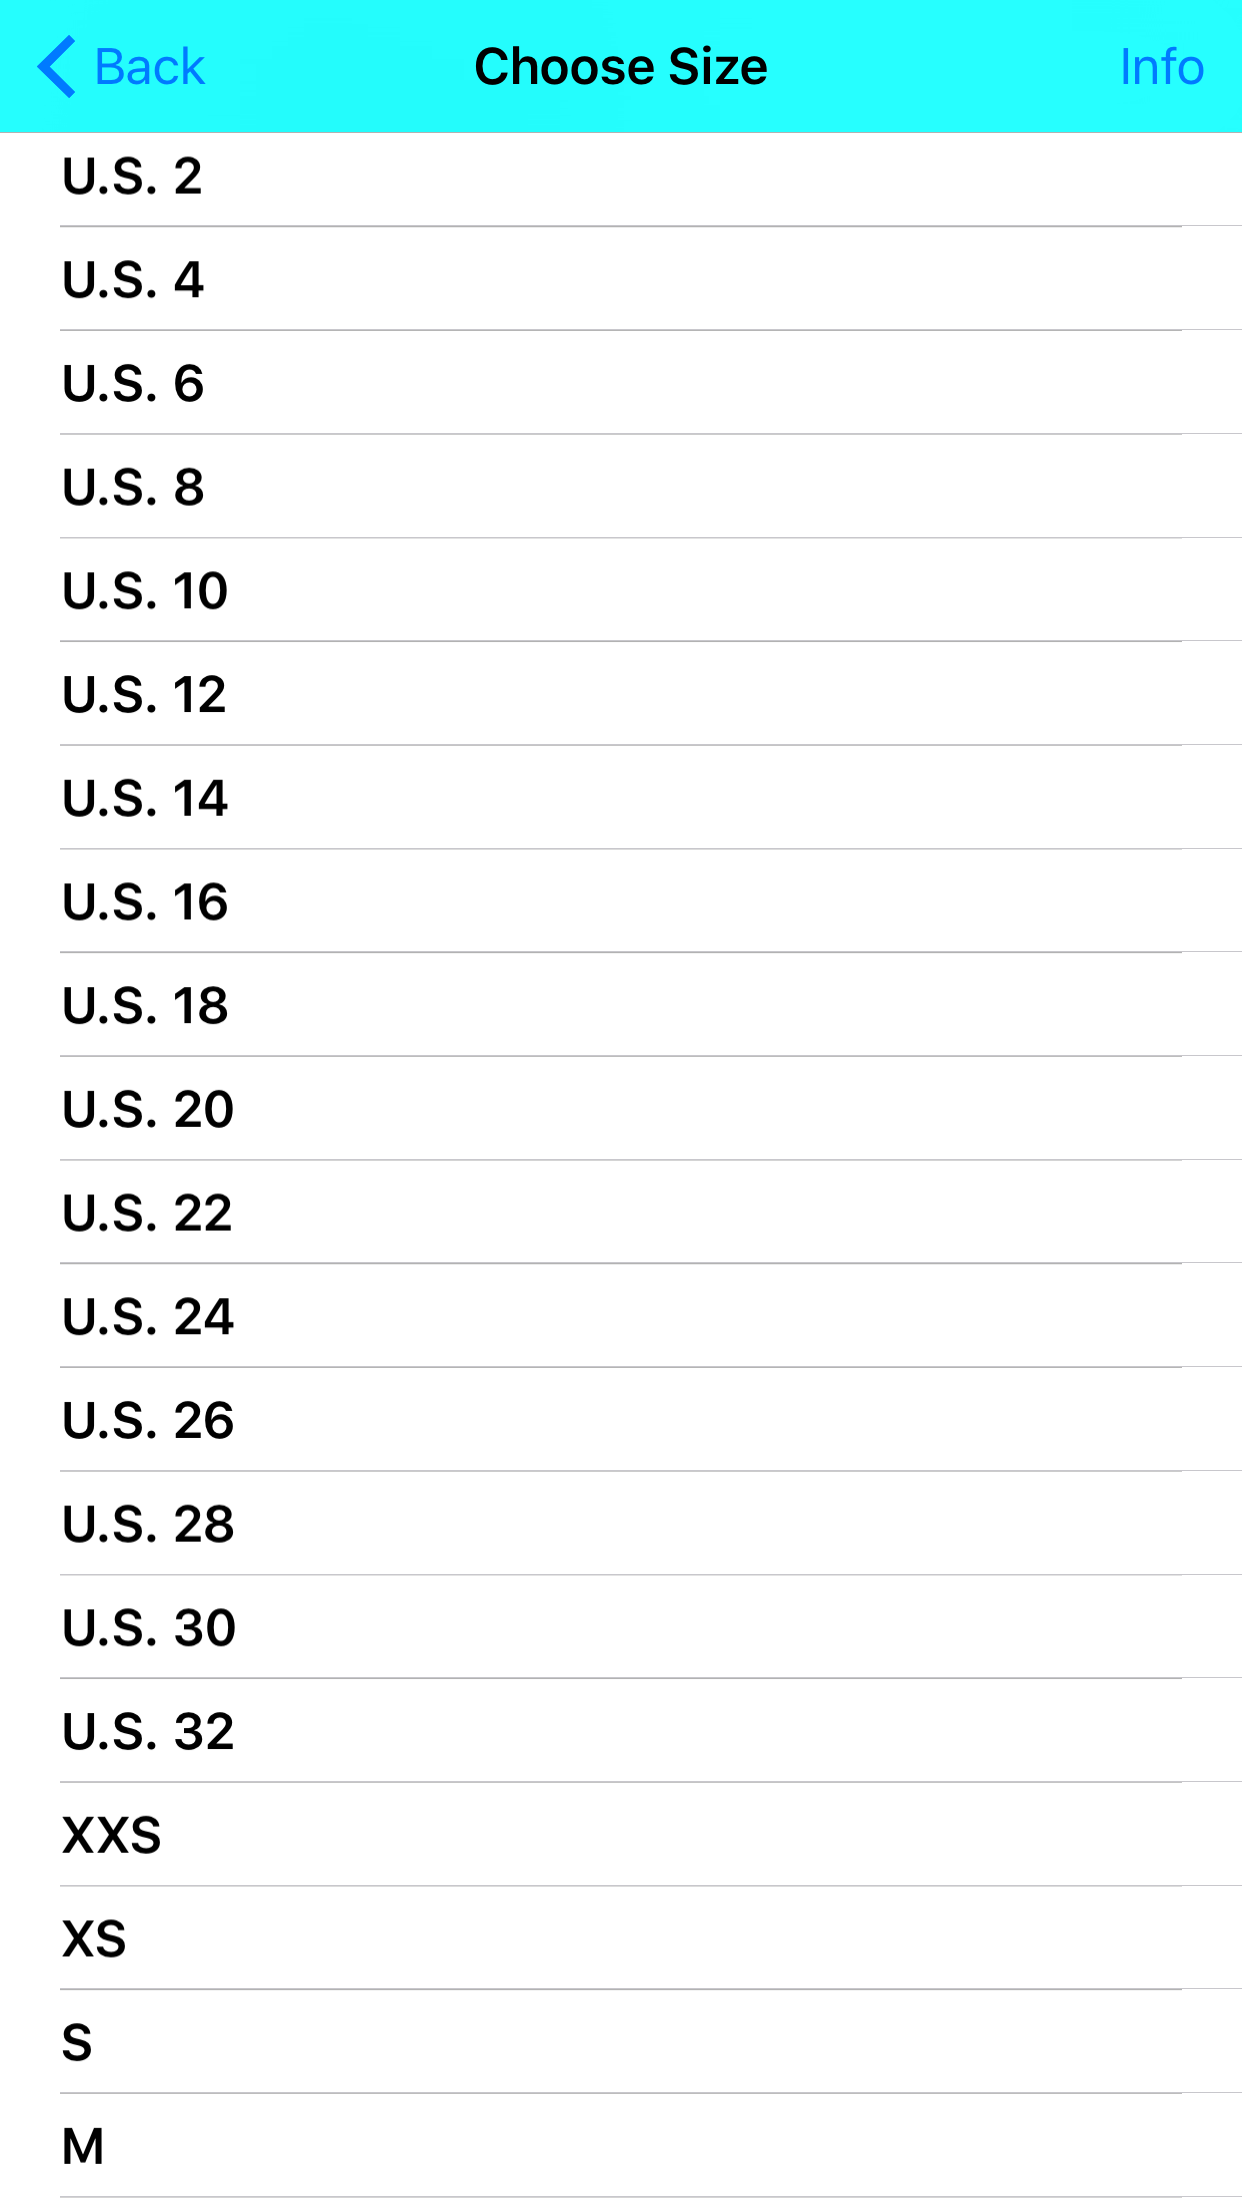
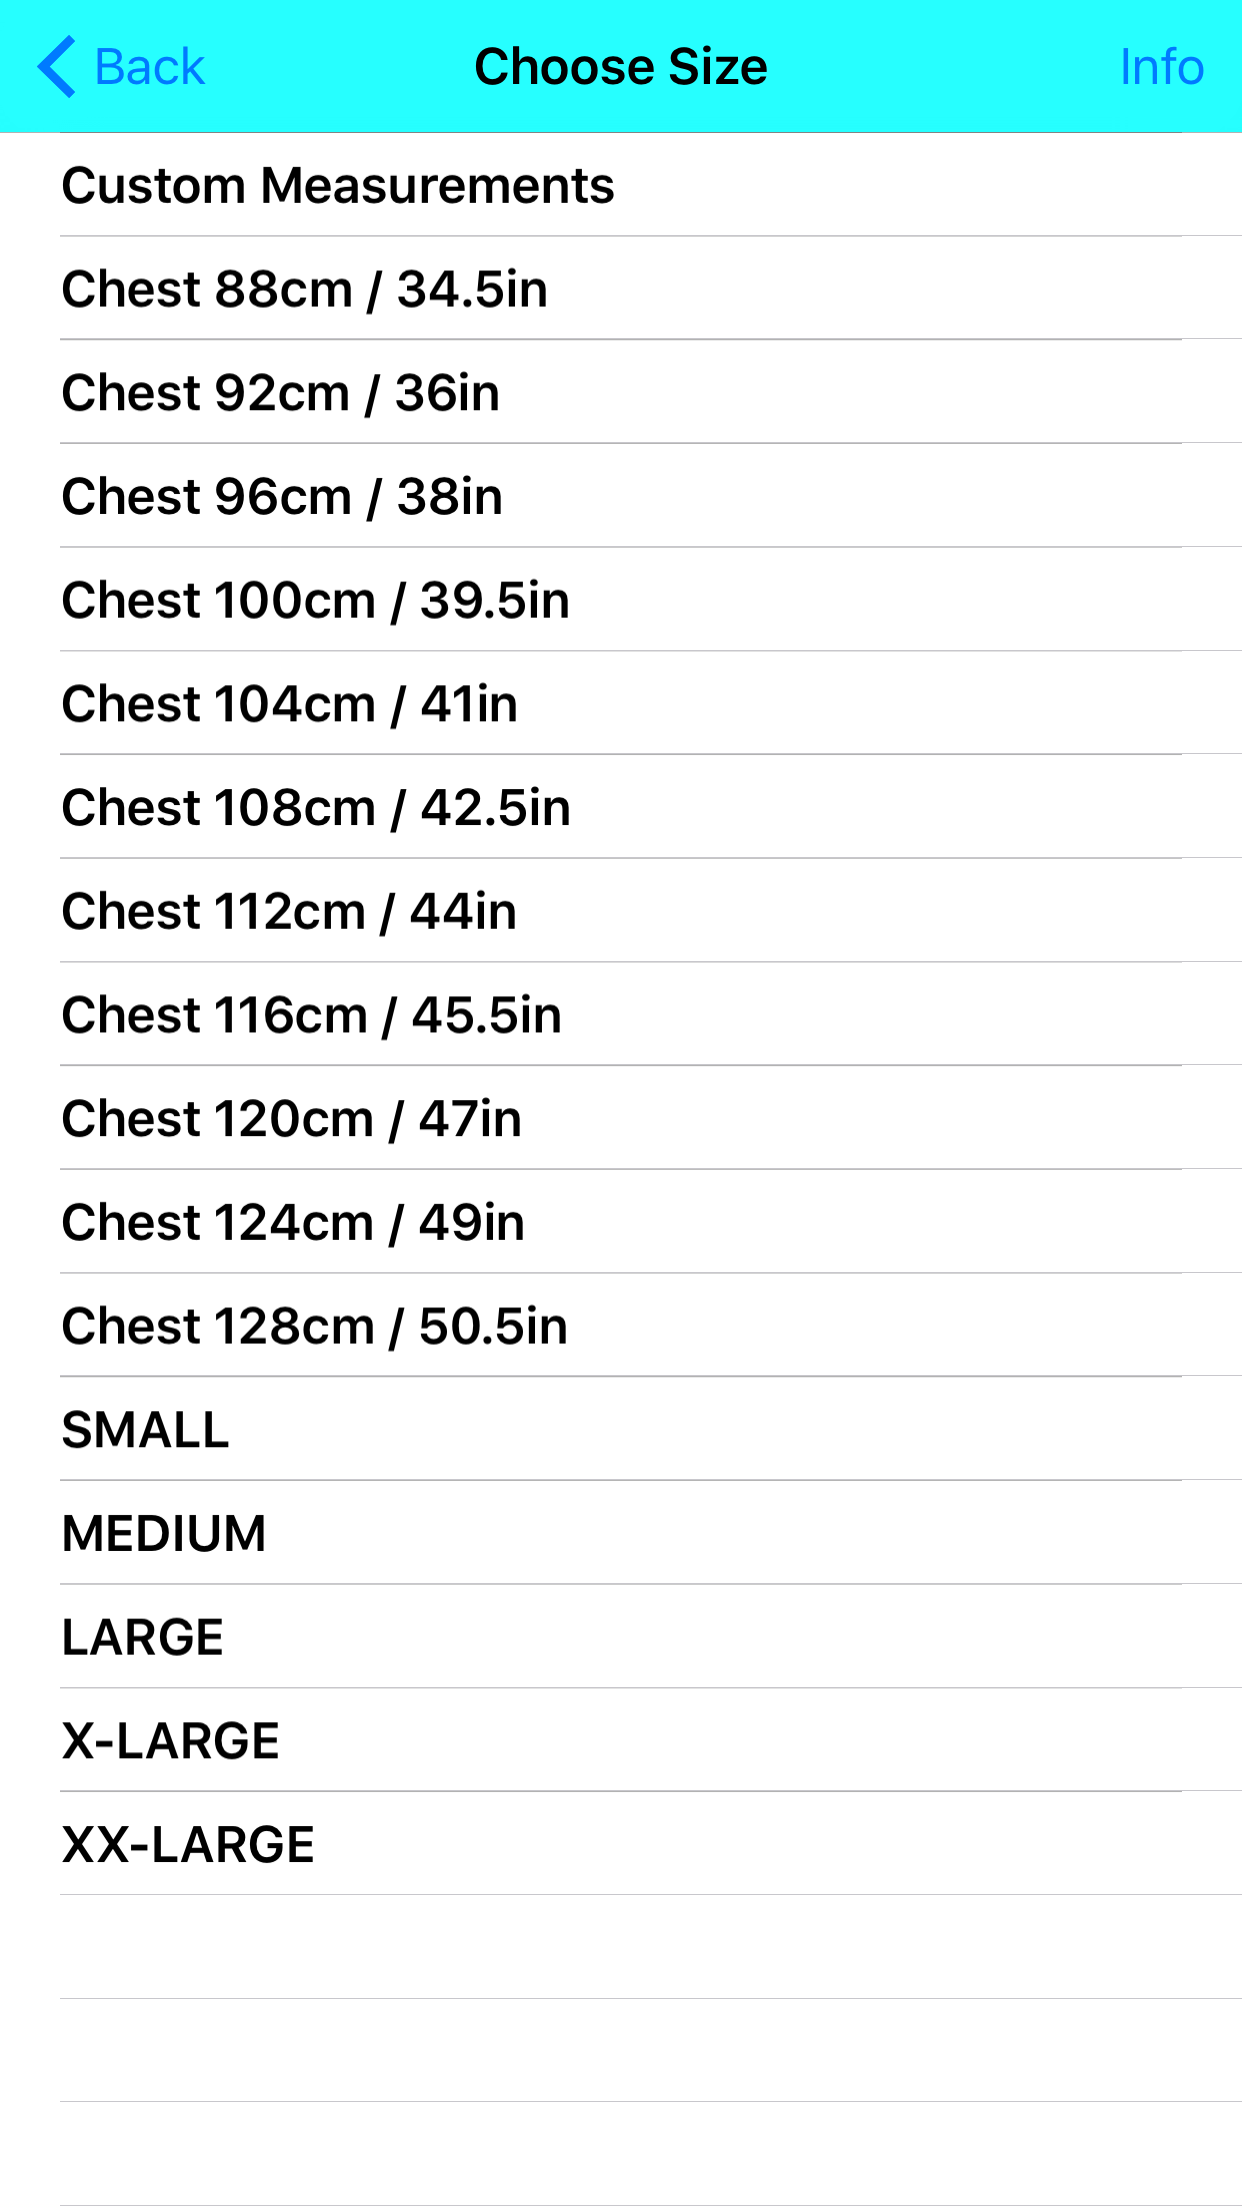
Size options for women’s U.S. Sizes Men’s size options Babies and Children - Chest Measurement: Measure around fullest part of chest.
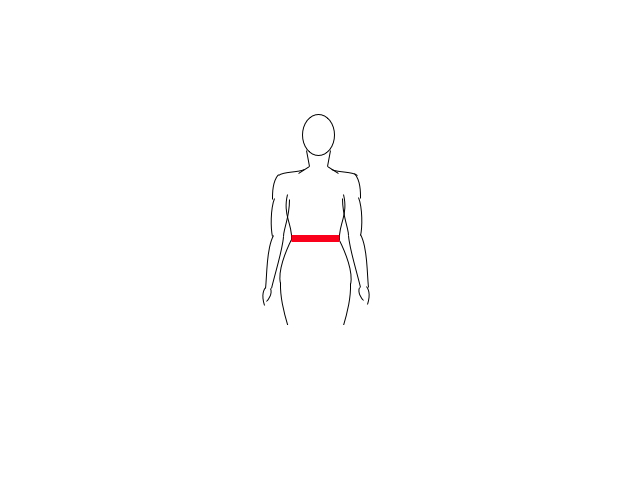
- Waist Measurement: Measure around natural waist.
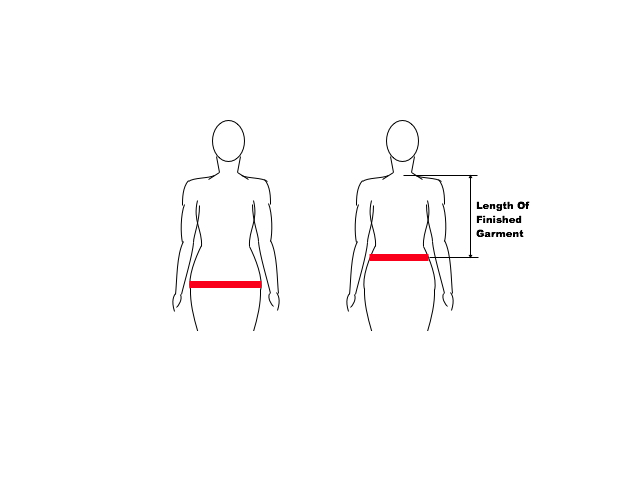
- Hip Measurement: Measure around body at the full length of the finished sweater /cardigan – measure widest hip if the garment is to come below hip length, and select the value in your chosen units. Note that for a cropped sweater this may be the same as waist measurement, or lower chest measurement.
- Underarm Length: Measure from wrist to armpit.
- Waist to Neck: Measure length from base of back neck to waist for the person this pattern is for, and select the value in your chosen units
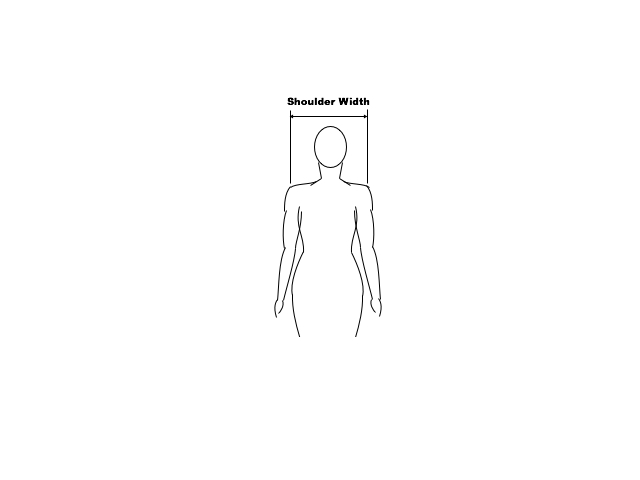
- Shoulder Width: Measure across the top of shoulders.
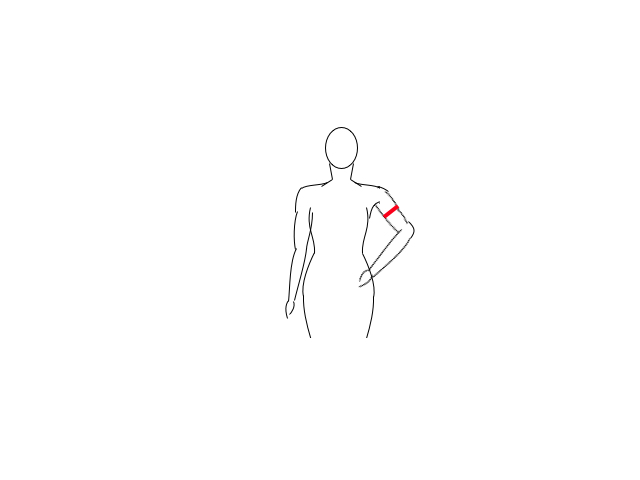
- Upper Arm: Measure around widest part of upper arm for the person this pattern is for, and select the value in your chosen units.
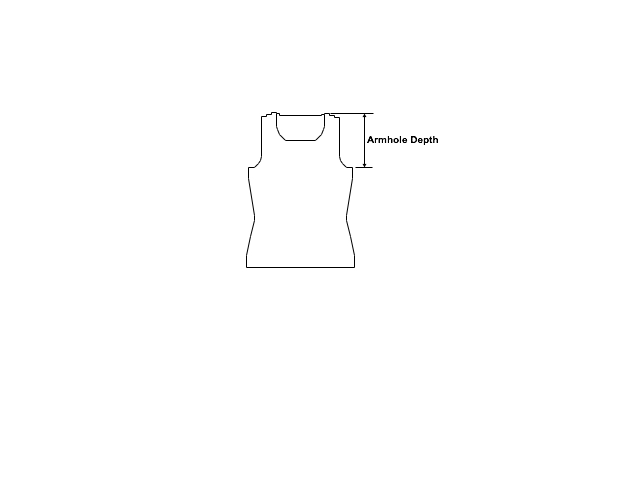
- Armhole Depth: Measure from top of shoulder straight down to underarm.
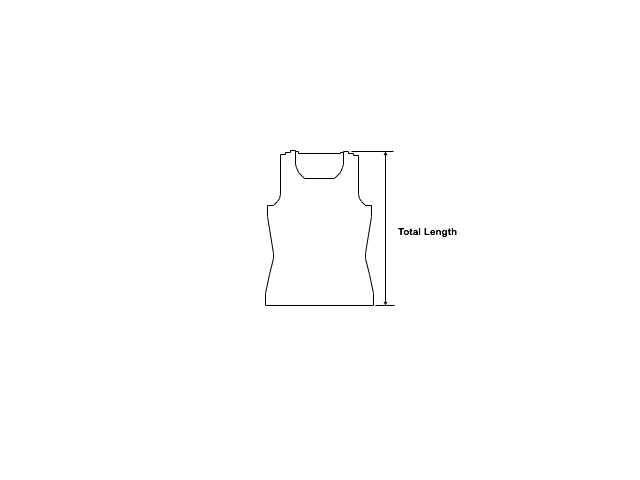
- Total Length: Select the total length (from back neck down) that you want this garment to be
- .
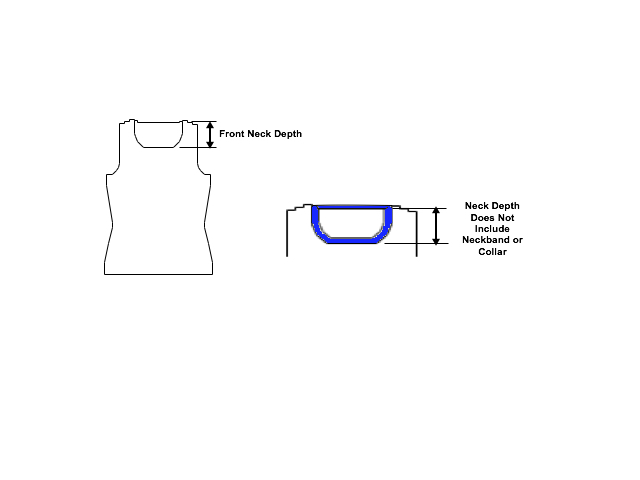
- Front Neck Depth: Select the depth, measured down from back neck, that you want the finished front neckline to be. Note that this pattern does not currently support necklines that are lower than armhole shaping. If the neck depth you have selected is too deep, a message will display when you view the pattern.
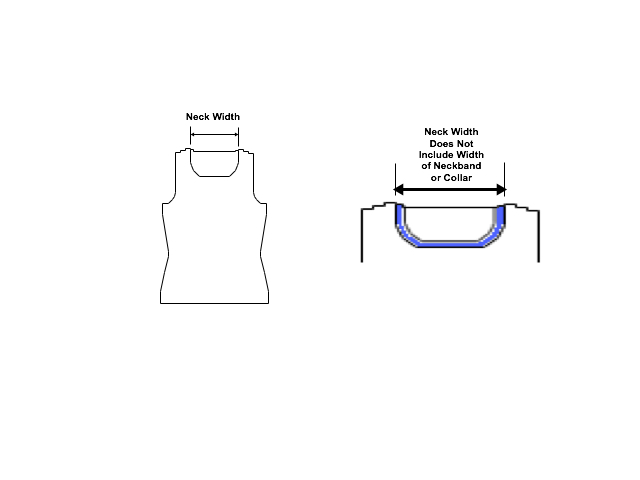
- Neck Width: Select the finished width for the neckline.
- Rib Length: Select your chosen length of ribbing.
- Actual Sleeve length – if you have chosen a standard size, this will automatically be calculated for the sleeve type that you have chosen, based on the underarm length for your chosen size. Use calculated value or choose your own.
- Cuff Length – This is automatically calculated of the chosen sleeve type. Use the calculated value or choose your own. For cap sleeve style, the cuff length is the same as the actual sleeve length.
- Cuff Size – this is the size around the finished cuff. For Cap and short sleeve styles this is the same as the upper arm measurement.
- When all measurement and options have been chosen, click the Done button at the bottom of the screen, or the Save button at the top right of the screen. This will then show the pattern you have just created in your pattern list
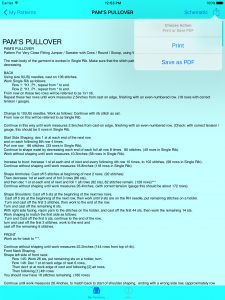
- Select the pattern name from your pattern list to show the text instructions.To print the pattern, or todisplay the pattern as a PDF that can be opened and saved in other applications, select the button at the top right corner of the the screen.
- If you want to see the schematic diagram, select the ‘Schematic’ button at the top of the pattern screen.
Example of a Schematic generated in the app. The Schematic diagram shows the pieces that you will knit, labelled with the key measurements, as well as with the number of stitches and rows.


 Babies and Children
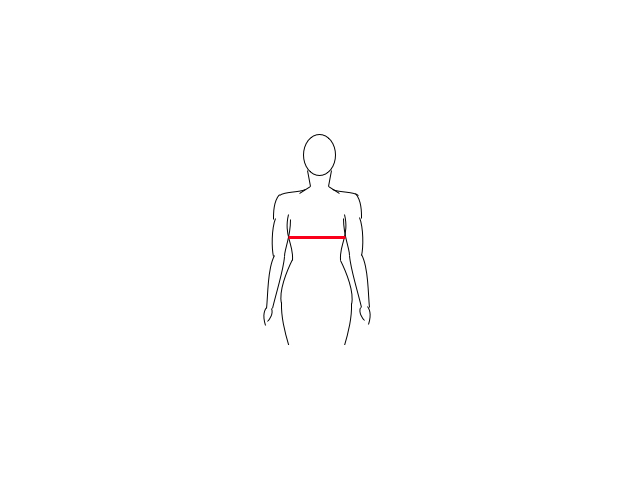


 To print the pattern, or todisplay the pattern as a PDF that can be opened and saved in other applications, select the button at the top right corner of the the screen.
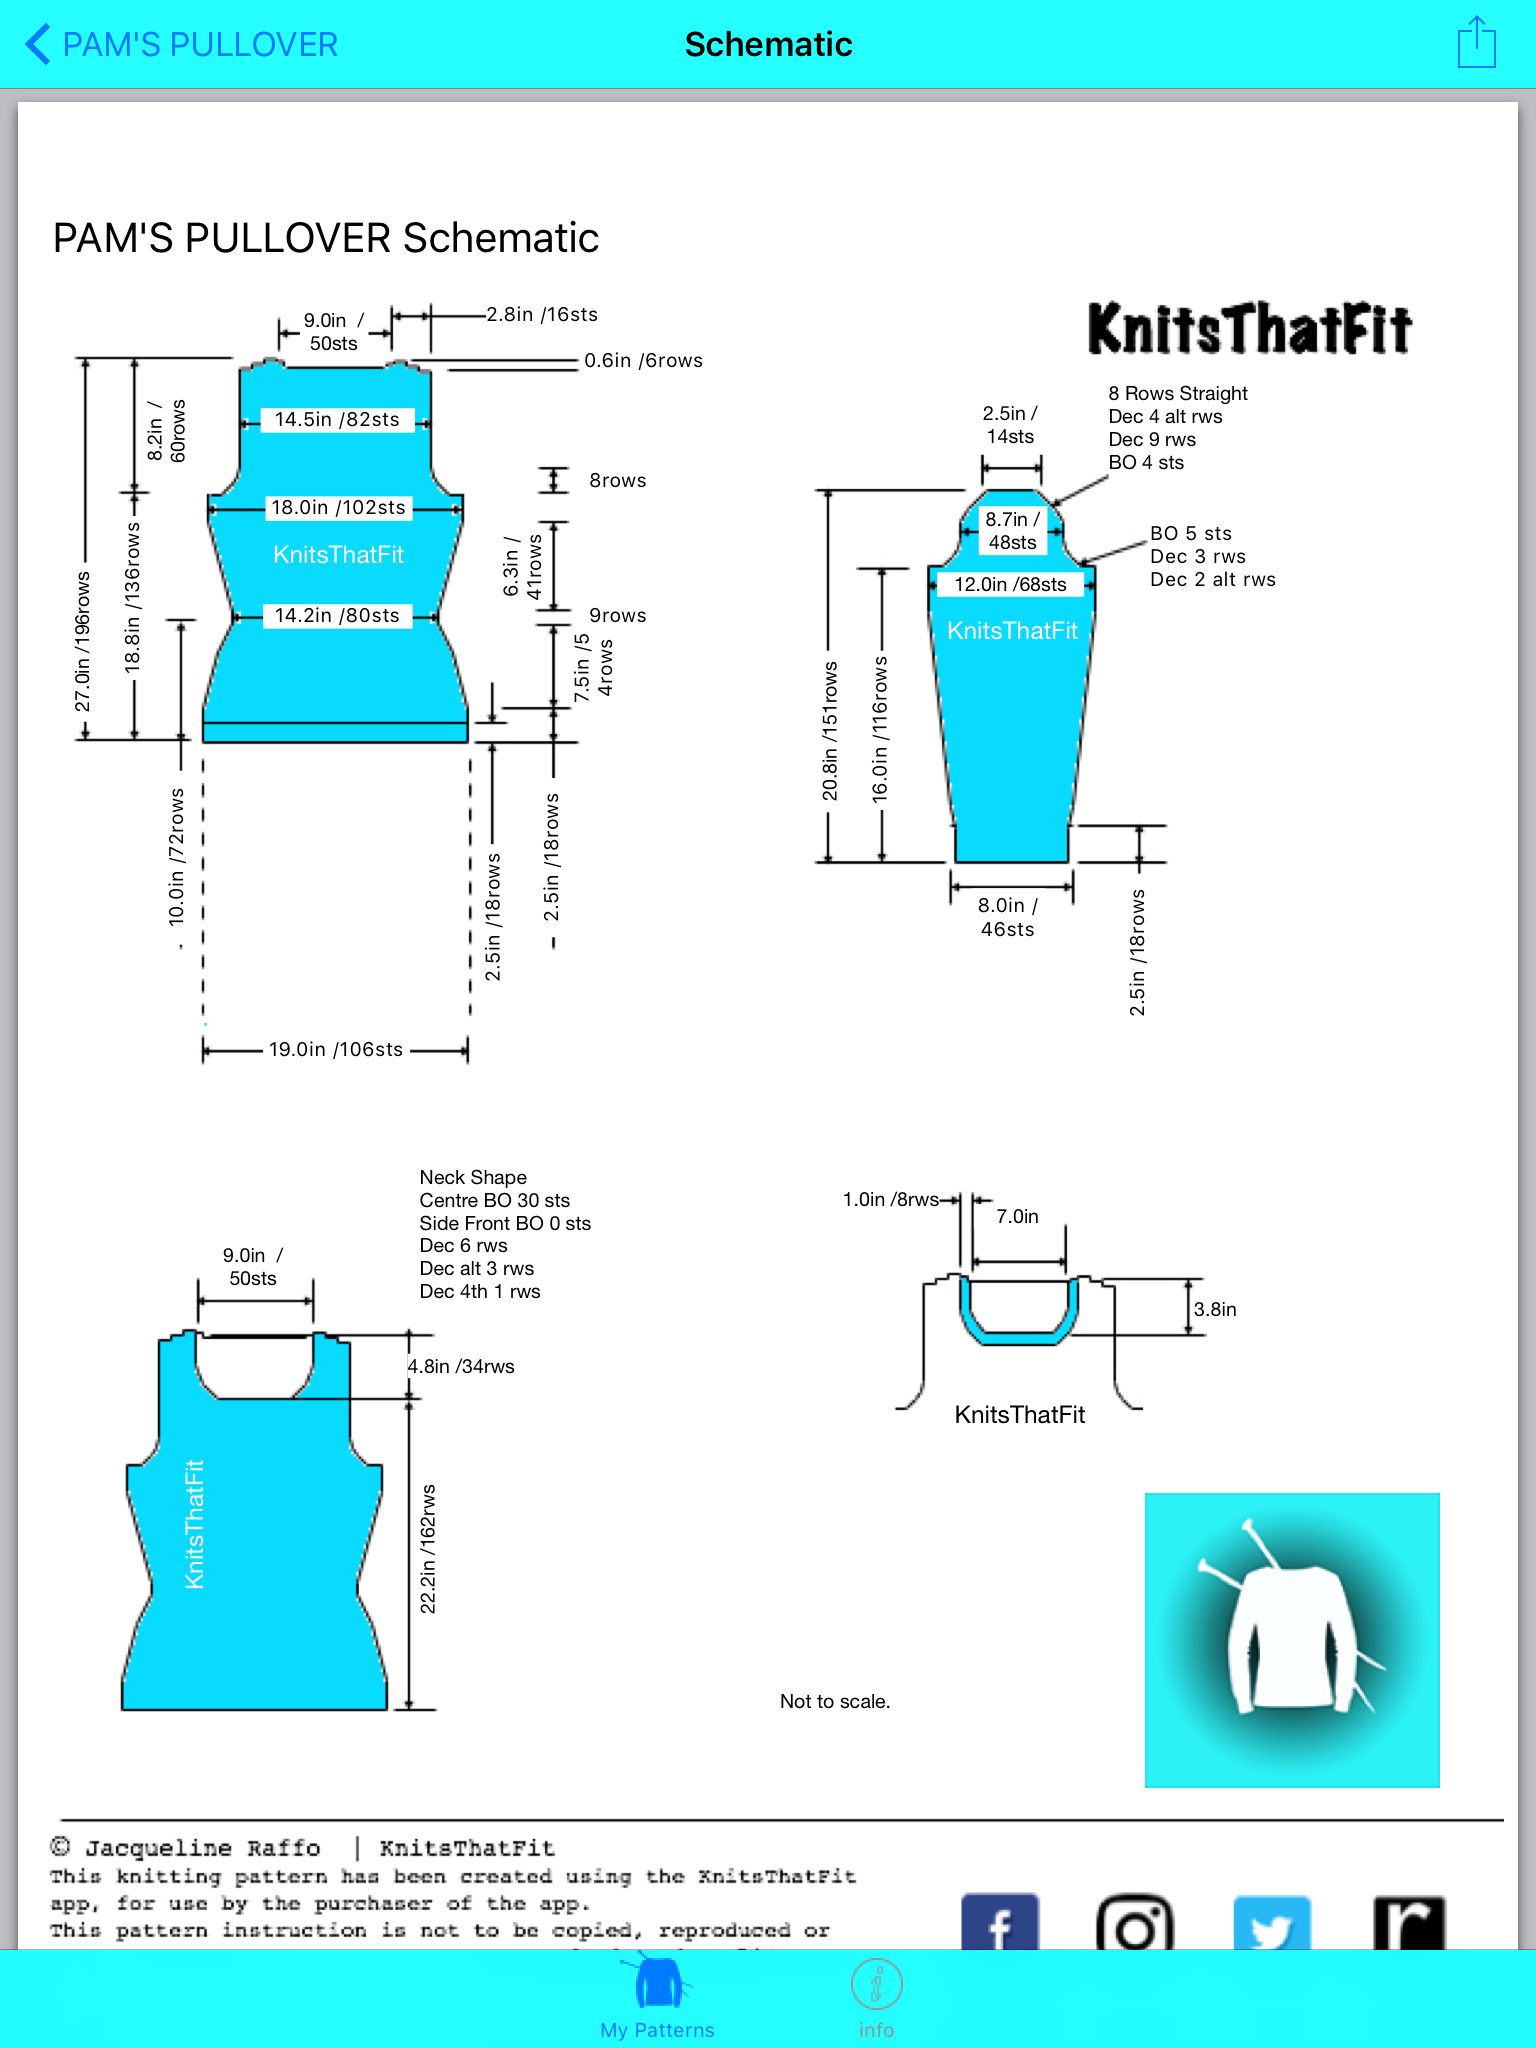
The Schematic can also be printed, or opened as a PDF that can be opened and saved in other applicable applications on your iPad or iPhone, just select the button at the top right of the screen and choose the Print or Save as PDF option.
I hope you enjoy knitting patterns with this app.
If you have the app and like it, please give me a positive review (please!)
I will be updating the app with more features in the future, if there is something you would like to see, please let me know!
If you are not happy with the app for any reason, please contact me and I will hopefully be able to resolve the issue.